
Members are the most important people in your club. It is vital to keep member records up-to-date.
Creating, editing, and deleting a Member
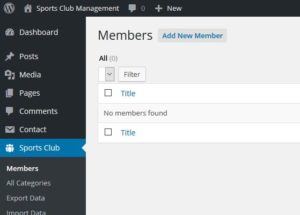
Create a new Member by clicking the ‘Add New Member’ button on the Members page.
You can enter the following information for a Member:
- Title
Any post in WordPress has a title. Typically, you enter the Member’s full name, but you can also enter a nickname. The title is the name that will show up on your site (the frontend) when you display data. - Fields (Member Data)
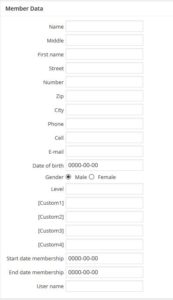
This is the record for an individual Member. ‘Level’ indicates the Member’s competitive level (if applicable for your club; e.g. a handicap in golf). The ‘User name’ is the WordPress user (login) name of this Member on your site.
There are 4 custom fields that you can use to your liking. The names of these fields can be set on the “General Options” page. Typical examples of custom fields are ‘bank account’, ‘membership ID’ - Categories, content, featured image
Editing and deleting a Member works like any WordPress post.
Note: Invoices and Competitions create references to Members. Deleting a Member will break this reference. If you want to delete a Member, it is recommended to delete its Invoices and edit its Competitions too. (Alternative: do not delete Members! See Best Practices.)
Bulk import of Members from a CSV file
Next to entering individual Members, creation of many Members at a time is supported if you have Member data in a CSV file.
Use the wizard at the bottom of the “Add New Member” page to upload Members from a CSV file.

Click the “Browse…” button to select a CSV file that you have created. This file shall have a certain format as indicated (an example CSV file – in English only – is available in the link at the bottom-left).
Click “Next” to read the CSV file. This results in a list of all Member data records that are found in the file. By using the check-boxes in front of each entry you can select and un-select which entries to create.
Click “Next” after, optionally, selecting whether the imported Members shall be stored as “Draft” or be published immediately.
Perform a final review and confirm. Click “Next” to start the creation process.
Exporting Members to a CSV file
Select “Export Data” from the menu.
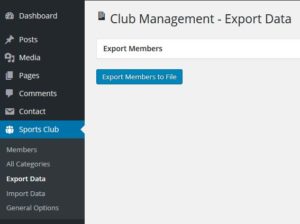
Press the ‘Export Members to File’ to download the membership data for all Members.
Member options
The “General Options” page provides Member options.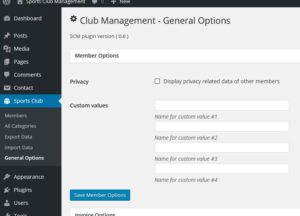
Here, the field names of the (four) custom fields are defined. Selecting the ‘Privacy’ option indicates that you do not mind publishing privacy related information (address, email, phone numbers, custom fields, etc.) on the front end of your site. By default, privacy related information is hidden.